Homemade Reese’s Cups Recipe
Highlighted under: Modern Collection
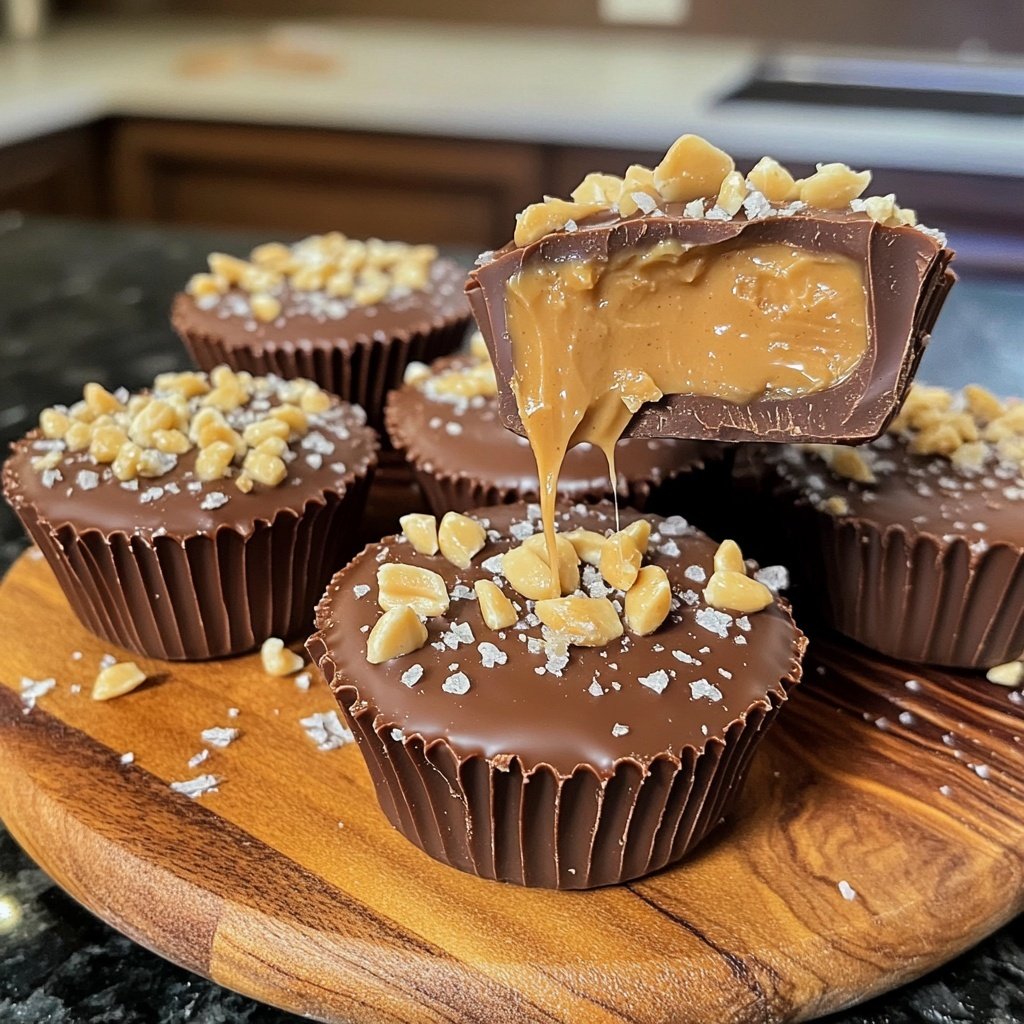
Indulge in the rich, chocolatey goodness of homemade Reese’s Cups. These delightful treats combine creamy peanut butter with smooth chocolate, making them a favorite for all chocolate lovers.

Making your own Reese’s Cups at home is not only fun but also incredibly satisfying. This recipe allows you to customize the sweetness and chocolate coating to your liking, giving you the perfect balance of flavors.
Why You'll Love This Recipe
- Rich chocolate flavor paired with fresh peanut butter
- Creamy texture that melts in your mouth
- Perfect for celebrations or as a sweet indulgence
The Joy of Homemade Treats
Creating your own candy at home can be a delightful experience. Not only do you get to enjoy the rich flavors of your favorite sweets, but you also have complete control over the ingredients. Making Homemade Reese’s Cups allows you to customize the sweetness and texture to suit your taste. Plus, there’s a certain satisfaction that comes from crafting something delicious with your own hands.
When you make these treats, you engage all your senses. The aroma of melting chocolate and the creamy peanut butter filling are simply irresistible. Each step in the process builds anticipation, and when you finally take a bite, the flavors meld together perfectly. It's an experience that store-bought versions simply can't replicate.
Perfect for Any Occasion
Homemade Reese’s Cups are not just a snack; they're a versatile treat that can enhance any occasion. Whether it’s a birthday party, holiday gathering, or just a cozy night in, these cups will be a hit. They can be easily packaged as gifts or party favors, making them a thoughtful and delicious gesture for friends and family.
Additionally, the process of making these cups can be a fun activity for kids and adults alike. Get the whole family involved in mixing, molding, and decorating, turning an ordinary day into a memorable event. Enjoying your homemade treats together creates lasting memories and strengthens bonds.
Storage and Shelf Life
Once your Homemade Reese’s Cups are ready, you might wonder how to store them properly. To keep them fresh, simply place the cups in an airtight container. They can be stored at room temperature for up to a week or in the refrigerator for a longer shelf life. Just make sure to separate layers with parchment paper to prevent sticking.
If you want to extend their shelf life even further, consider freezing them. Wrap each cup individually in plastic wrap and place them in a freezer-safe bag. They can last for up to three months in the freezer. When you're ready to enjoy them, simply let them thaw at room temperature for a few minutes before indulging.
Ingredients
For the Peanut Butter Filling
- 1 cup creamy peanut butter
- 1/4 cup powdered sugar
- 1/2 teaspoon vanilla extract
For the Chocolate Coating
- 2 cups milk chocolate chips
- 1 tablespoon coconut oil
Make sure to have all ingredients measured and ready for easy preparation.
Instructions
Prepare the Peanut Butter Mixture
In a mixing bowl, combine the creamy peanut butter, powdered sugar, and vanilla extract. Mix until smooth and well combined.
Melt the Chocolate
In a microwave-safe bowl, combine the chocolate chips and coconut oil. Microwave in 30-second intervals, stirring in between, until fully melted and smooth.
Assemble the Cups
Line a muffin tin with cupcake liners. Pour a thin layer of melted chocolate into each liner, then add a spoonful of the peanut butter mixture on top. Finally, cover with more melted chocolate.
Chill and Set
Refrigerate the cups for about 20 minutes or until the chocolate is firm. Once set, carefully remove the cups from the liners.
Enjoy your homemade Reese’s Cups as a delightful treat!
Pro Tips
- For an extra crunch, add chopped nuts to the peanut butter mixture before assembling.
Common Variations
There are countless ways to put a spin on your Homemade Reese’s Cups! For a crunchy texture, try adding chopped nuts or crispy rice cereal to the peanut butter filling. This adds an exciting crunch that contrasts beautifully with the smooth chocolate coating.
If you're a fan of dark chocolate, feel free to swap out the milk chocolate chips for dark chocolate ones. This can enhance the flavor profile and add a touch of sophistication to your treats. You might even experiment with flavored chocolates, such as sea salt caramel or mint, for a unique twist.
Tips for Perfect Cups
To achieve the perfect balance of chocolate and peanut butter, don’t skimp on the layers. Make sure you have a sufficient amount of melted chocolate at the bottom and top, encasing the peanut butter filling properly. This ensures a delightful chocolatey experience with every bite.
Another tip for an easier assembly is to chill the peanut butter mixture before using it in the cups. This will make it firmer and easier to scoop, preventing it from melting into the chocolate layer. A little patience goes a long way in creating beautifully layered homemade treats.
Questions About Recipes
→ Can I use dark chocolate instead of milk chocolate?
Yes, dark chocolate can be used for a richer flavor.
→ How should I store these homemade Reese’s Cups?
Store them in an airtight container in the refrigerator for up to a week.
→ Can I make these cups vegan?
Yes, use vegan chocolate chips and natural peanut butter without added sugar.
→ What can I substitute for coconut oil?
You can use vegetable oil or butter as a substitute for coconut oil.
Homemade Reese’s Cups Recipe
Created by: Lottie Pennington
Recipe Type: Modern Collection
Skill Level: Easy
Final Quantity: 12 cups
What You'll Need
For the Peanut Butter Filling
- 1 cup creamy peanut butter
- 1/4 cup powdered sugar
- 1/2 teaspoon vanilla extract
For the Chocolate Coating
- 2 cups milk chocolate chips
- 1 tablespoon coconut oil
How-To Steps
In a mixing bowl, combine the creamy peanut butter, powdered sugar, and vanilla extract. Mix until smooth and well combined.
In a microwave-safe bowl, combine the chocolate chips and coconut oil. Microwave in 30-second intervals, stirring in between, until fully melted and smooth.
Line a muffin tin with cupcake liners. Pour a thin layer of melted chocolate into each liner, then add a spoonful of the peanut butter mixture on top. Finally, cover with more melted chocolate.
Refrigerate the cups for about 20 minutes or until the chocolate is firm. Once set, carefully remove the cups from the liners.
Extra Tips
- For an extra crunch, add chopped nuts to the peanut butter mixture before assembling.
Nutritional Breakdown (Per Serving)
- Calories: 380 kcal
- Total Fat: 26g
- Saturated Fat: 15g
- Cholesterol: 195mg
- Sodium: 85mg
- Total Carbohydrates: 32g
- Dietary Fiber: 3g
- Sugars: 24g
- Protein: 6g